 ExSpade
How to Make Better Decisions Through Every Five-Trick Hand
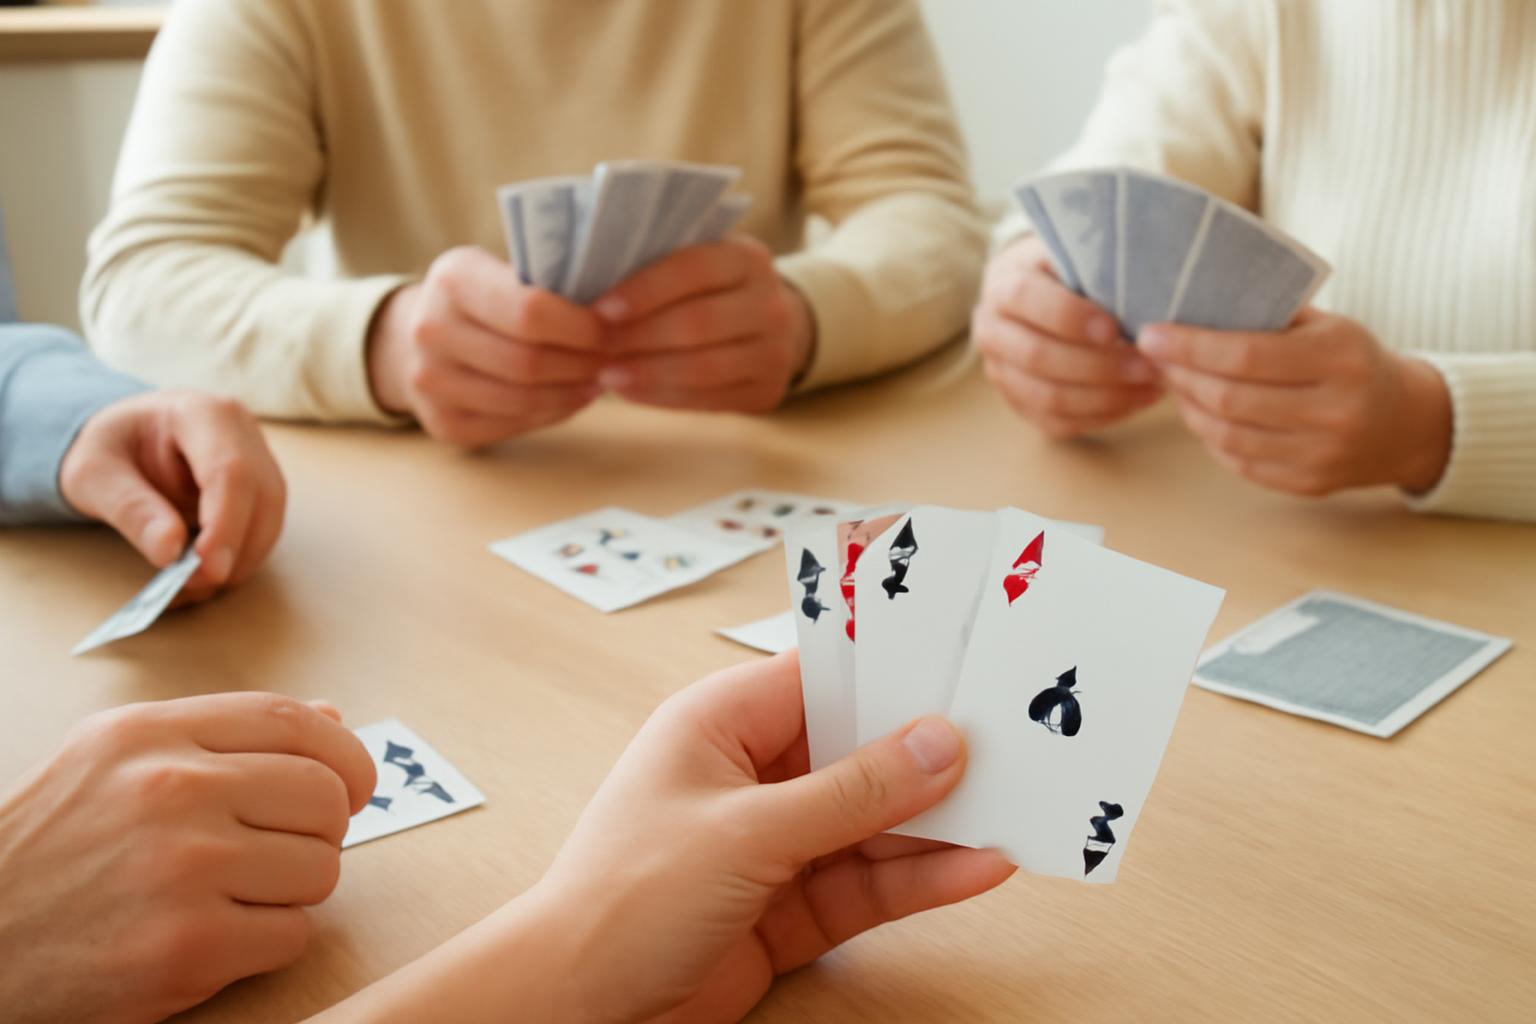
Good Euchre card game strategy is less about memorizing slogans than forming a plan. Before calling trump, identify a believable route to three tricks. After the call, decide whether drawing trump, cashing a side winner, creating a void, or preserving control best supports that route.
Every decision is compressed into a five-trick hand. Bowers, trump length, off-suit aces, seating position, the dealer’s pickup, known voids, score, and local rules can turn a useful default into the wrong play. The recommendations below are practical heuristics drawn from published rules and strategy guidance—not guarantees or claims of mathematically optimal play.
Set the Rules Before Applying the Strategy
This guide assumes four players in two partnerships, partners sitting opposite each other, and a 24-card deck containing the 9, 10, Jack, Queen, King, and ace of every suit. Each player receives five cards, and each hand contains five tricks under the rules described by the Chicago Sport and Social Club. These conventions are common, but they are not universal.
Trump has a special seven-card ranking:
- Right Bower: Jack of trump
- Left Bower: Jack of the same color as trump
- Ace of trump
- King of trump
- Queen of trump
- 10 of trump
- 9 of trump
Cards in a non-trump suit rank ace, king, queen, Jack, 10, and 9.
The Left Bower does not merely rank as trump; it legally belongs to the trump suit. If hearts are trump, the Jack of diamonds is a heart for that hand. It cannot be used to follow a diamond lead. If hearts are led and it is your only heart, you must play it.
Compact Euchre glossary
- Maker: A player who names trump, together with that player’s partner unless the maker goes alone.
- Defender: A member of the partnership that did not make trump.
- Trick: One card played by each active player. The highest trump wins if any trump is played; otherwise, the highest card of the led suit wins.
- Trump: The suit elevated above all other suits for the hand.
- Euchre: The result when the makers take fewer than three tricks.
- March or sweep: Winning all five tricks as a partnership.
- Loner: A hand played by one player while that player’s partner sits out.
- Void: Having no cards in a particular suit.
- Ruff: Playing trump because you cannot follow the suit led.
- Order up: Accept the upcard’s suit as trump, requiring the dealer to pick up that card.
- Second-round call: Name a different trump suit after everyone rejects the upcard’s suit.
Under the scoring convention used throughout this guide, makers receive one point for taking three or four tricks and two points for taking all five. Defenders receive two points when they euchre the makers. A lone player receives four points only for winning all five tricks; taking three or four alone earns one point under this convention, as shown in the Arizona Spartans rules and scoring chart.
Confirm the table rules before the first deal. One material variation concerns what happens after everyone passes in both bidding rounds:
- Under stick-the-dealer, the dealer must name trump.
- Under a redeal rule, the hand is abandoned and the deal moves on.
Also ask whether ordering up a partner forces a lone hand, whether a defender may play alone, and whether the deck includes a Joker or “Benny.” These variations can change bidding decisions. A hand that may pass safely when a redeal is available could require a least-damaging call when the dealer is stuck.
Evaluate a Hand by Its Route to Three Tricks
Do not evaluate a possible call by asking only, “How many trump do I have?” Ask, “Where could our three tricks come from?”
Sort the hand into three planning categories:
- Likely winners: Cards expected to win under ordinary play, such as the Right Bower or a protected high trump.
- Conditional winners: Cards that may win after another event, such as an off-suit ace that becomes safer once defenders’ trump is removed.
- Partner-dependent possibilities: Tricks your partner may contribute based on the bidding and play, but which you cannot identify in your own hand.
This framework separates genuine control from superficial length. Three trump can be strong, but three low trump without a side winner may struggle when the bowers and trump ace are elsewhere. By contrast, the Right Bower, another trump, and an off-suit ace provide three distinct resources: top-trump control, support, and a possible side-suit trick.
Prioritize these features:
- Bower strength: The Right Bower gives immediate top-trump control. The Left Bower is powerful but still loses to the Right.
- Supporting trump: One high trump may win once but leave no later control.
- Trump length: Multiple trump may let you draw enemy trump, ruff side suits, or retain a trump for a late trick.
- Off-suit aces: These can supply a trick, especially before opponents become void in the suit.
- Voids: A void may create a ruffing opportunity, although you still need the relevant suit to be led.
- Dealer pickup: The dealer can add the upcard and discard, potentially gaining trump length while creating a void.
- Seat and score: A borderline hand changes character when you are ordering an opponent, helping a partner, facing a forced call, or trying to limit an opposing loner opportunity.
Consider a holding of the Right Bower, queen and 10 of trump, an off-suit ace, and a low side card. The Right Bower can draw or capture trump. The other two trump provide length, and the ace offers a possible outside winner.
That hand does not guarantee three tricks, but it supports a coherent sequence: establish trump control, remove enough defensive trump to protect the ace, and use the ace or remaining trump for the other tricks.
Now contrast it with one weak trump, no side ace, no useful void, and four low side cards. That holding has no self-contained route to three tricks. It may improve because of score pressure, a partner’s known pickup, or stick-the-dealer, but those are contextual reasons to act—not evidence that the original cards are strong.
Published advice differs over how much partner help a bidder should assume. Some guidance treats two probable winners as a reason to consider bidding because the partner may supply another; other guidance warns against making a call that depends entirely on rescue. The useful synthesis is to treat partner help as an allowance, not a bankable trick. The tension between two-winner and three-winner bidding standards also appears in this explanation of Euchre bidding.
Use this pre-bid test:
Name the three tricks—or name the conditions that could reasonably create them.
For example:
- The Right Bower wins or controls one trick.
- A supported trump may win after higher cards appear.
- An off-suit ace may win after defenders’ trump is removed.
Conditional does not mean certain. The purpose is to distinguish a plan from a hope. There is no fixed number of trump or rigid formula that guarantees a sound call.
Bid Through Both Rounds With Seat and Dealer in Mind
In the first bidding round, players decide only whether the upcard’s suit will become trump. If anyone orders it up—or the dealer accepts it—the dealer adds the upcard to the five-card hand and discards one card face down.
The dealer therefore receives more than a visible trump. The pickup can improve the dealer’s suit distribution by replacing a weak side card or helping create a void.
Ordering an opponent dealer requires more strength than assisting a partner in comparable circumstances. Ordering an opponent gives that player a known trump and a useful discard. Ordering your partner strengthens your own partnership. The same personal holding may therefore justify assisting a partner while being too weak to order an opponent.
Use this first-round checklist:
- How strong is the upcard? Ordering the Right Bower into an opponent’s hand is different from ordering a low trump.
- How much trump control do I hold? Count bowers, supporting trump, and rank—not merely the number of trump.
- Who is dealing? A partner’s pickup helps your side; an opponent’s pickup makes your task harder.
- Where are my outside winners? Side aces or strong side combinations may provide the third trick.
- What can the dealer discard? The pickup may create a void as well as add trump.
- What happens if I pass? Consider the remaining bidders, possible second-round suits, score, and pass-out rule.
Two strong probable tricks are a reason to consider bidding, particularly when your partner is dealer or the score supports calculated aggression. They are not an automatic call. Three probable tricks provide a more self-contained foundation because the bid depends less heavily on unknown partner strength.
If everyone passes, the upcard is turned down and the second round begins. Under the baseline rules used here, players may name a different suit but cannot name the rejected upcard suit again.
One useful second-round concept is the same-color principle. After a suit is rejected, examine the other suit of the same color because the relevant Jack changes rank.
Suppose clubs is the upcard suit and you hold the Jack of spades. If clubs becomes trump, that card is the Left Bower—the second-highest club trump. If clubs is rejected and you later call spades, the same card becomes the Right Bower and therefore the highest trump. The same-color call promotes it from prospective Left Bower to Right Bower.
Passing to pursue that promotion carries real risk. Another player may accept clubs before the second round begins. Even if clubs is rejected, a player acting before you in round two may name another suit.
A rejected upcard also provides only limited information. It shows that the players who passed were unwilling to make that suit under the current score, seat, and table conditions. It does not prove where either Bower is located. Players pass because of weak support, unfavorable position, score considerations, or interest in another suit.
Under stick-the-dealer, a dealer facing three second-round passes must choose something. There is no supported universal threshold for that forced decision. Compare the available suits by Bower strength, trump length, side aces, void potential, and the information provided by the rejected upcard. The objective is to choose the least damaging available suit, not to pretend the hand has become strong.
The following snapshots illustrate reasoning rather than validated optimal play.
Snapshot 1: Ordering a partner dealer with Bower support
- Upcard: 10 of hearts
- Your relevant cards: Left Bower, king of hearts, ace of clubs
- Dealer: Your partner
You hold two strong hearts and a side ace. Your partner will pick up another heart and discard one card.
Reasoning outcome: Ordering is attractive because your existing strength combines with a pickup that benefits your partnership.
Snapshot 2: Declining to order an opponent dealer with one weak trump
- Upcard: king of spades
- Your relevant cards: 9 of spades and four weak side cards
- Dealer: Opponent
Ordering would give the opponent a high trump and a discard while you hold no top control or side winner.
Reasoning outcome: Pass under ordinary conditions. Score pressure may alter the choice, but the cards alone do not support the order.
Snapshot 3: Considering a same-color call
- Upcard: club, rejected by everyone
- Your relevant cards: Jack of spades, another spade, ace of hearts
The Jack of spades would have been the Left Bower if clubs had become trump. Calling spades instead makes it the Right Bower. The second spade supports it, and the heart ace offers a possible outside trick.
Reasoning outcome: Spades deserves serious consideration, although the ace remains vulnerable to a ruff.
Snapshot 4: Choosing under stick-the-dealer
- You are dealer, and everyone passes twice.
- No suit gives you three obvious winners.
- Diamonds would give you two trump and a void.
- Clubs would give you one Bower but no supporting trump.
This is not a choice between a strong call and a pass. It is a comparison of weak options.
Reasoning outcome: Compare control, length, side strength, and ruffing potential. Do not mechanically choose the suit containing the highest single card.
Lead Trump Only When Drawing It Improves the Hand
“The maker should always lead the highest trump” is too broad. Leading trump is a tool, not an obligation.
The main reason to lead trump is to remove defenders’ trump so that side-suit winners are less likely to be ruffed. That investment is most attractive when you have enough trump length or top control to survive the draw and side cards that become more valuable afterward.
Suppose you call with three middle or low trump plus an ace-king side holding. The side cards look strong, but either may be ruffed if a defender is void. Leading trump may remove those ruffing cards and turn the side holding into safer winners. Joe Andrews specifically recommends considering a trump lead with three middle or low trump and strong side combinations such as ace-king, ace-queen, or king-queen in his Euchre strategy guidance.
A trump lead may be less attractive when:
- You need your trump to ruff side suits.
- You lack control of the top trump and may surrender the lead without improving your side cards.
- Your partner called, and drawing trump may strip resources the maker needs for ruffs.
- You hold an exposed side ace that may need to be cashed before opponents shed the suit.
- Preserving a Bower gives you control over a later, more important trick.
Distinguish a singleton ace from an ace accompanied by lower cards. A singleton ace may be urgent: delaying gives opponents more opportunities to become void and ruff it. An ace with one or more lower cards presents a different problem. The ace may win once, but its accompanying cards may remain weak, and repeated leads can change who is void.
Use extra caution with an ace in the same-color non-trump suit. If hearts are trump, the Jack of diamonds moves into hearts as the Left Bower. Only five cards remain legally in diamonds, so a diamond ace belongs to a shorter side suit and may encounter a void sooner.
A maker’s opening-lead decision tree
1. Identify your side winners. Do you have a singleton ace, a strong side combination, or no credible outside winner?
2. Ask whether defenders can ruff them. Did the bidding or known distribution suggest a void? Is the side suit shortened because its Jack became the Left Bower?
3. Assess trump control. Do you hold the Right Bower, both Bowers, several trump, or only unsupported low trump?
4. Compare the two main plans.
- Draw trump when removing defensive trump is likely to promote multiple side winners.
- Cash the exposed winner when delaying creates a serious ruff risk and a trump draw would not establish broader control.
5. Preserve control when appropriate. A Bower does not need to be spent merely because it is the highest card. Saving it may let you regain the lead or control the final trick.
The right question is not “Should makers lead trump?” It is “What becomes better after I lead trump?” If there is no concrete answer, reconsider the lead.
Count the Seven Trump and Track Who Is Void
The chosen trump suit has seven possible cards: its six printed cards plus the same-color Jack acting as the Left Bower. Published beginner guidance likewise recommends tracking the Bowers, trump ace, and remaining trump rather than attempting to reconstruct every hidden card immediately.
Start by tracking:
- Right Bower
- Left Bower
- Trump ace
- Total trump played
- Which players fail to follow each suit
A failed follow reveals a void at that moment. If clubs are led and a defender plays a heart because that player has no clubs, future club winners may be vulnerable if that defender retains trump. This can determine whether you cash a club ace immediately, draw trump first, or avoid returning clubs.
Counting requires two separate questions:
- Which trump are accounted for? This includes trump known to be in your hand as well as cards already played.
- Which trump have actually been played? Only played trump are out of everyone’s hand.
Do not treat “all seven accounted for” as equivalent to “all seven played.” A known trump still in your hand—or known to remain with another player—can still affect a later trick.
Consider this corrected sequence:
- Hearts are trump.
- You called with the Right Bower, ace of hearts, and 10 of hearts.
- Before play, you know three of the seven trump. Four are outside your hand, although some may be in the kitty.
- On trick one, you lead the Right Bower. Your partner plays the 9 of hearts, one defender plays the queen of hearts, and the other defender cannot follow.
- Five unique trump are now accounted for: your Right Bower, ace, and 10, plus the visible 9 and queen. Only three trump have actually been played because your ace and 10 remain in your hand.
- Two trump—the Left Bower and king—remain unaccounted for. The defender who failed to follow the trump lead has no trump at that point.
- On trick two, you lead the ace of hearts. Your partner discards, the defender who played the queen follows with the king, and the other defender discards again.
- Six unique trump are now accounted for. Five trump have been played: Right Bower, 9, queen, ace, and king. You still hold the 10, while the Left Bower remains unaccounted for.
- On trick three, you lead the 10. Your partner discards, the same defender plays the Left Bower, and the final defender discards.
- All seven trump have now been identified and played. From trick four onward, no side-suit card can be ruffed because no trump remains in any active hand.
The sequence does not reveal exact hidden hands in advance. It narrows the possibilities one play at a time and shows why known-but-unplayed cards must be separated from cards already gone.
Counting informs practical decisions:
- Lead an ace: Safer when every opposing trump has been played or when play has established that no opponent retains trump.
- Spend a high trump: Necessary when an unaccounted Bower may otherwise win; wasteful when your partner is secure and no later opponent can overtake.
- Discard: Consider creating a useful void or preserving side strength rather than automatically throwing the lowest rank.
- Overtake: Consider it when taking the lead lets you draw a dangerous remaining trump.
- Save control: Retain top trump for a late trick when the remaining distribution makes that control valuable.
Void information also changes over time. A player who followed the first club lead may have held only one club and become void afterward. Counting cannot reveal every hidden card, but it progressively limits what is possible.
Beginners should count only trump at first. Once that becomes comfortable, separately note the two Bowers and trump ace. Then add off-suit aces and player voids. Trying to reconstruct all hidden hands immediately usually creates more confusion than insight.
Play as a Partnership Without Wasting Winners
When your partner is already likely to win a trick, do not spend a higher trump merely to make the result look safer. The partnership receives one trick either way, while the unnecessary overtake may consume a card that could win another.
The seating order matters. You cannot assume a partner’s card is safe while an opponent still has a realistic opportunity to beat it.
Consider a legally ordered example:
- Hearts are trump.
- An opponent leads clubs.
- Your partner, playing second, is void and ruffs with the 9 of hearts.
- The next opponent follows clubs with a low card.
- You are last to play, are also void in clubs, and hold the queen of hearts.
Your partner’s 9 is already winning, and no opponent remains to act. Playing the queen would convert your partner’s winner into your winner without increasing the partnership’s trick total. Discarding a side card preserves the queen for later.
The same default applies whenever your partner has already trumped and you know no later player can overtake. But it is a default, not a prohibition. Overtaking can be correct when:
- You need the lead for a necessary trump draw.
- Your partner’s likely continuation would expose the team to a euchre.
- Taking the lead lets you cash an urgent side ace.
- An opponent still to play can beat your partner, making your higher card necessary.
- Lead control is more valuable than preserving the card for an uncertain later trick.
Maker and partner have different responsibilities. The maker should enter the hand with a plausible route to three tricks. The partner should provide complementary value—an ace, timely ruff, high trump, or useful lead—without competing for tricks already secured.
Advice about the maker’s partner leading trump conflicts because different hands require different plans. A trump lead may help when drawing defenders’ trump protects the maker’s side winners. It may hurt when the maker needs those trump to ruff side suits or lacks top control. Neither “always lead trump to your partner” nor “never lead trump to your partner” is adequate.
Holding the Left Bower creates a notable tactical option. Playing or leading it promptly can remove lower trump and transfer the lead to the maker when the partnership needs a trump draw. That does not justify using it to ruff or overtake a trick the maker is already certain to win.
Partnership information must come from legal play: the bid, opening lead, cards played, suits followed, and revealed voids. Explicit signals, coded gestures, and table talk are not sound partnership strategy and may violate table rules.
Before playing each card, use this role-based check:
| Role | Questions to ask |
|---|---|
| Maker | Where are our three tricks? Does this card draw trump, protect a winner, create a ruff, or retain control? |
| Maker’s partner | Is the trick secure? Can I preserve a winner? Would taking the lead clearly advance the maker’s plan? |
| Defender | Can we still take three tricks? Would leading trump help the makers? Which suit can expose or force a weakness? |
Supporting a partner does not mean playing high whenever possible. It means using each card where it can add a trick.
Defend the Call and Stop Lone-Hand Sweeps
Ordinary defense and loner defense have different immediate priorities.
Against ordinary makers, the objective is to take at least three tricks and score a two-point euchre—not merely to prevent a sweep. Taking one trick stops the makers from scoring two, but it should not distract defenders from a realistic path to three.
Do not lead trump automatically. The partnership that named trump usually expects that suit to help its plan. A defender’s trump lead may remove defensive ruffing cards and establish the makers’ side aces.
A strong side-suit lead can be more disruptive. It may:
- Reveal whether the maker or maker’s partner is void.
- Force the makers to decide whether to spend trump.
- Cash a defensive ace before players shed the suit.
- Expose a weak side card.
- Help defenders determine which suits each partner may control.
Ordinary-defense example
Hearts are trump, called by the opponent dealer. You hold ace-king of clubs, a low diamond, a low spade, and no trump.
Leading the club ace tests the suit immediately. If a maker is void, that player must decide whether spending trump is worthwhile; the maker may also discard and rely on later position or a partner. If all players follow, the king may remain a second defensive resource.
Reasoning objective: Develop a path to three defensive tricks rather than saving every high card for an ideal opportunity that may never arrive.
Against a lone player, the immediate priority is stopping all five tricks. Under the common scoring used here, one defensive trick prevents the four-point lone sweep. A strong non-trump opening is therefore a sound general option, particularly from a suit less likely to match the loner’s side winner.
This remains contextual. No opening lead guarantees a stop, and a weak or long side suit may run directly into the loner’s ace.
Defenders should also avoid duplicating coverage unnecessarily. If one defender’s play suggests strength in clubs, the other may need to retain a diamond or spade stopper rather than discard every card from those suits. Neither defender knows the complete hand, but preserving different suits creates more possible ways to take one trick.
Loner-defense example
Spades are trump. The lone player sits to your left. You hold ace of hearts, queen of diamonds, 10 of clubs, and two low spades.
Leading the heart ace immediately tests your strongest non-trump card before the loner can draw defenders’ trump. If it wins, the sweep is stopped. If the loner ruffs, your partner learns that hearts will not stop the hand and may preserve strength in another suit.
Reasoning objective: Find one defensive trick before the loner can remove defensive trump and establish a side winner.
Going alone should require exceptional control and a credible path to all five tricks when the purpose is to pursue four points. Both Bowers with supporting trump and a protected outside winner is qualitatively different from three low trump and two weak side suits. A hand that is good enough to call is not automatically good enough to play alone.
Let the Score and Context Modify the Defaults
The same cards can justify different risks at different scores because the consequences differ. Under this guide’s scoring convention, an ordinary made hand scores one point, a sweep scores two, a euchre gives the defenders two, and a lone sweep scores four.
With a large lead, a team may prefer calls with clearer trick paths rather than accept unnecessary two-point swings. A team far behind may need calculated aggression because conservative one-point opportunities may not close the gap quickly enough. Score pressure can justify accepting more uncertainty, but it does not turn a weak card into a winner.
Late-game defense adds another consideration. At certain scores where your team has nine points and the opponents could end the game with a lone sweep, ordering or picking up more lightly may function as a block. By making trump yourself, you prevent the opponents from declaring a loner in another suit during that hand.
This is a conditional tactic, not a universal command to make a weak call. A blocking bid can still be euchred for two points. Compare the realistic threat of an opposing loner with the immediate danger of making an underpowered call. Joe Andrews’ score-based advice similarly treats lighter late-game orders as dependent on the score and defensive holding rather than as an absolute rule.
At 9-9, extra scoring margin has no value under a first-to-10 game: whichever team scores wins. The priority is securing the hand, not pursuing a bonus that cannot change the match outcome. That still does not create one exact bidding threshold, because seat, pickup value, distribution, and table rules differ.
Use this score-awareness checklist:
- What is the current score?
- How damaging would a two-point euchre be?
- Could passing create a realistic opposing loner opportunity?
- Does one point end the game?
- Is a sweep bonus strategically relevant?
- Does stick-the-dealer force someone to act?
- Am I changing the decision for a concrete scoring reason or merely reacting emotionally?
Myth versus context
| Myth | Better contextual rule |
|---|---|
| Always lead trump when you call it. | Lead trump when drawing it protects or promotes side winners; preserve it when you need ruffs or later control. |
| Always bid with three trump. | Examine rank, Bower control, side winners, seat, pickup, and score. Three low trump are not automatically sufficient. |
| Always count on one partner trick. | Treat partner help as a conditional possibility, not a guaranteed asset. |
| Never overtake a partner. | Avoid waste by default, but overtake when gaining the lead serves a necessary plan. |
| Always discard the lowest card. | Compare rank with suit structure. Creating a void or preserving useful side strength may be more valuable. |
| Three tricks alone earn four points. | Under the scoring used here, a lone player needs all five tricks for four points; three or four earn one. |
Improvement comes from reviewing decisions rather than merely remembering whether the cards cooperated. After a close hand, record:
- The score and table rules.
- Your seat and who dealt.
- The call you considered.
- The three tricks you planned.
- Whether your opening lead supported that plan.
- Which trump and voids you tracked correctly.
- Whether the result came from a flawed decision or an ordinary unfavorable distribution.
Practice counting trump before attempting to reconstruct complete hidden hands. Once the seven-trump count becomes automatic, add Bowers, side aces, and player voids.
The central method is straightforward: establish the rules, identify a realistic route to three tricks before calling, use trump only when it advances that route, distinguish accounted trump from trump already played, and play for the partnership rather than for isolated tricks. Strong Euchre decisions are contextual. Seat, dealer pickup, score, known voids, and remaining trump can turn a sound default into the wrong play.
Frequently Asked Questions
How many trump cards do you need before calling trump in Euchre?
There is no fixed number. Three trump can be strong, but their ranks and the rest of the hand matter. Three low trump without a side winner may lack control, while the Right Bower, one supporting trump, and an off-suit ace may provide a clearer route to three tricks.
Classify your cards as likely winners, conditional winners, and partner-dependent possibilities. If you cannot describe how the partnership might reach three tricks, raw trump count alone is not enough.
Should you always lead trump when you call it?
No. Lead trump when removing defenders’ trump makes your side aces or strong side combinations safer. This is most compelling when you have trump length or top control plus outside winners.
Preserve trump when you need it for ruffs, lack top-trump control, or have an exposed side ace that may need to be cashed immediately. Lead a Bower as part of a plan, not from habit.
Does the Left Bower count as its printed suit or as trump?
The Left Bower belongs to trump for both ranking and following suit. It is the Jack of the same color as trump and ranks immediately below the Right Bower.
If hearts are trump, the Jack of diamonds is legally a heart. It must follow a heart lead when required and cannot follow a diamond lead. Its movement into trump gives the trump suit seven possible cards.
When should you go alone in Euchre?
Go alone when you have exceptional control and a credible route to all five tricks. Strong candidates often combine the Bowers, supporting trump, and an outside winner unlikely to be ruffed.
Do not equate “good enough to call” with “good enough to go alone.” Under the scoring used here, the four-point award requires all five tricks. Consider lead position, side-suit vulnerability, score, and whether your partner is more likely to prevent a euchre than interfere with a sweep.
What is the best opening lead against a lone player?
A strong non-trump card is a useful general choice because it tests the loner before that player can draw defensive trump. An immediate side ace may secure the one trick needed to stop the sweep.
There is no universally best lead. Consider trump color, your strongest side card, suit length, seating position, and which other suits your partner may need to cover.